How I Got My Idea:
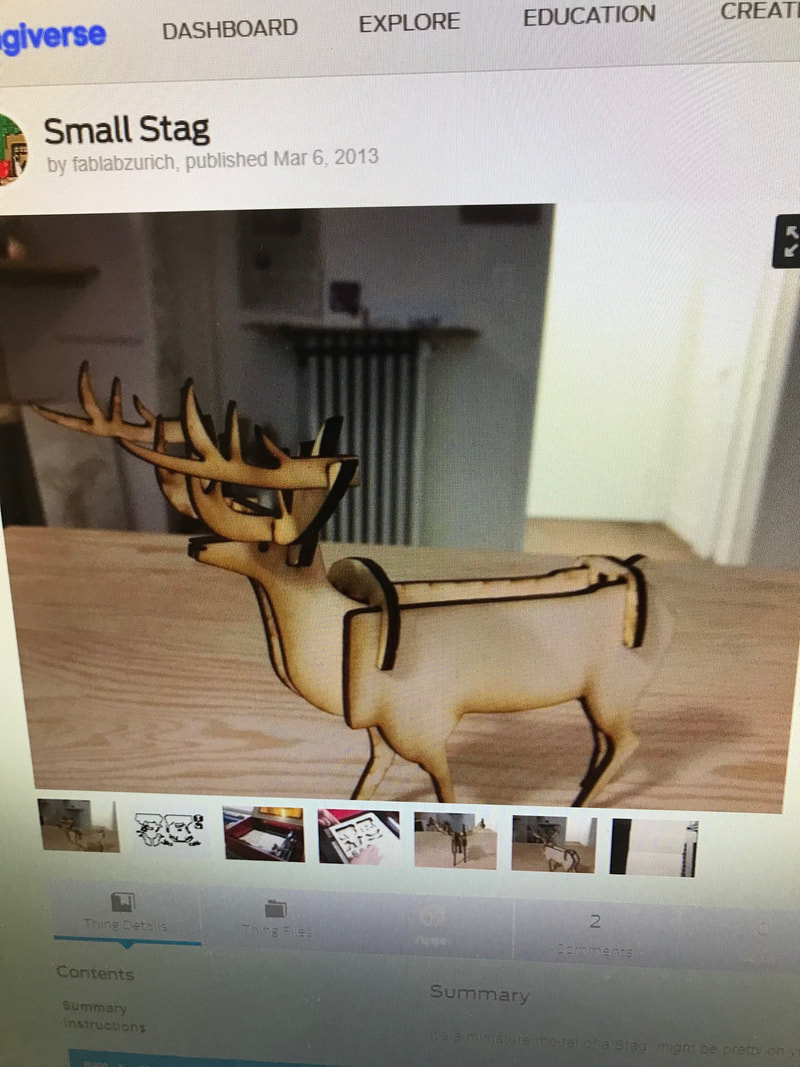
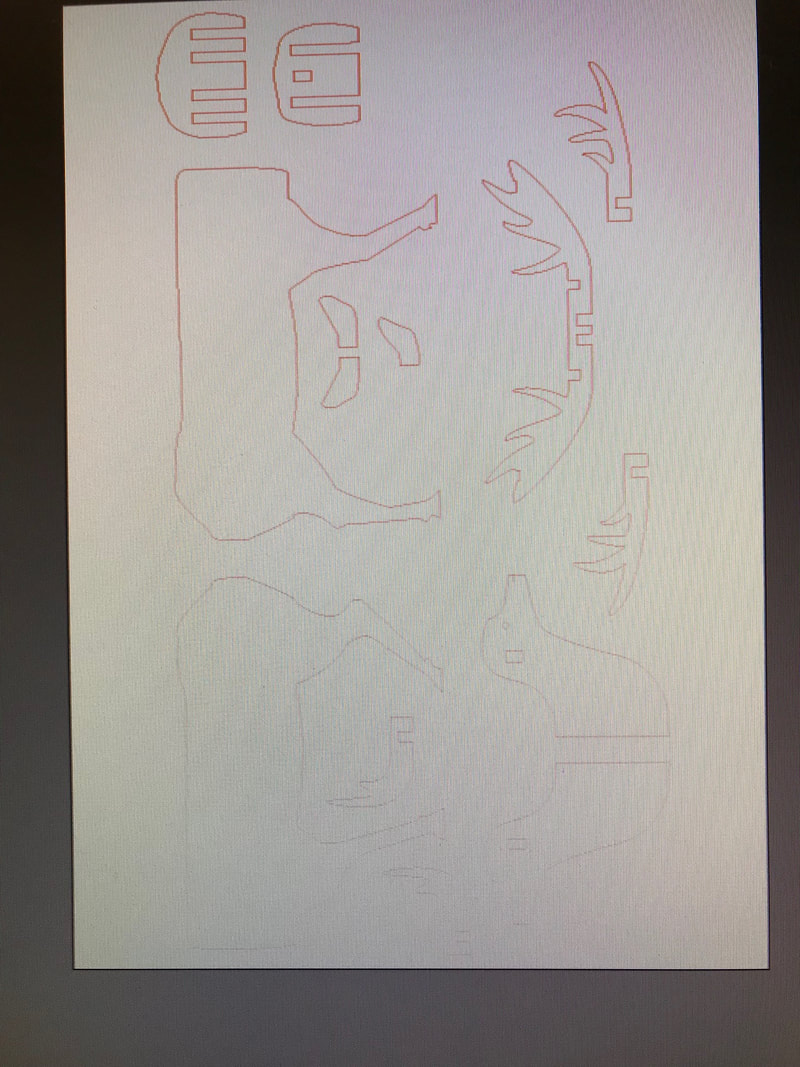
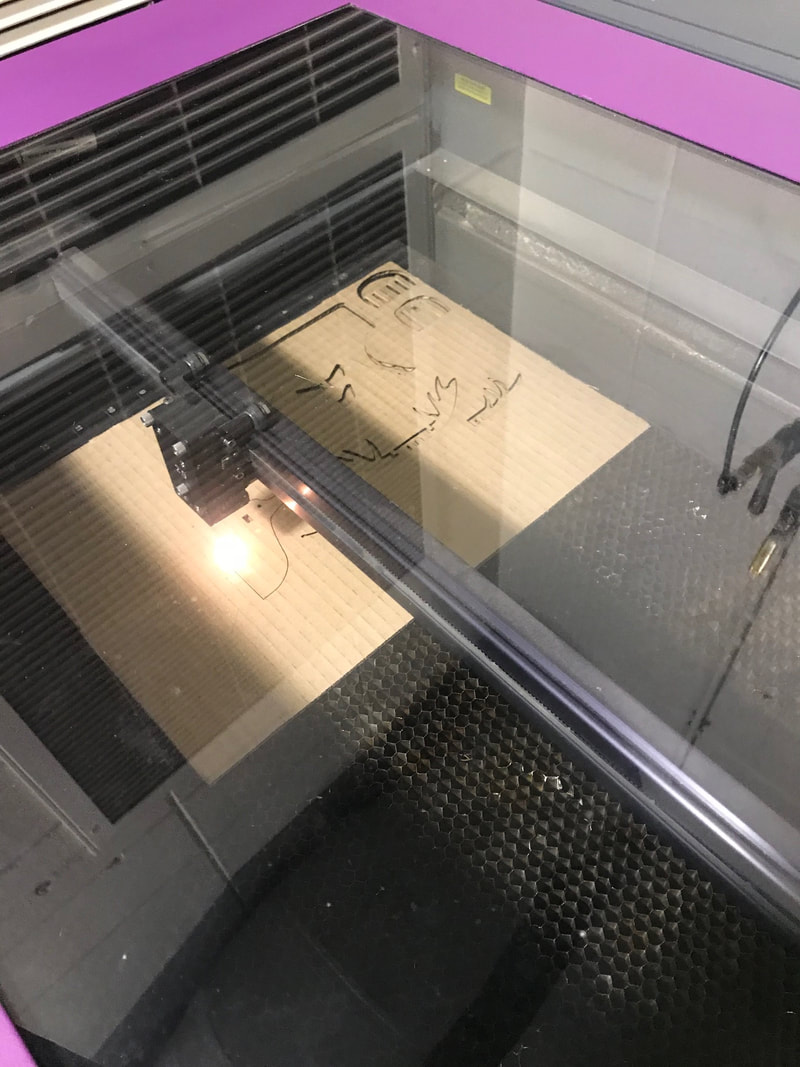
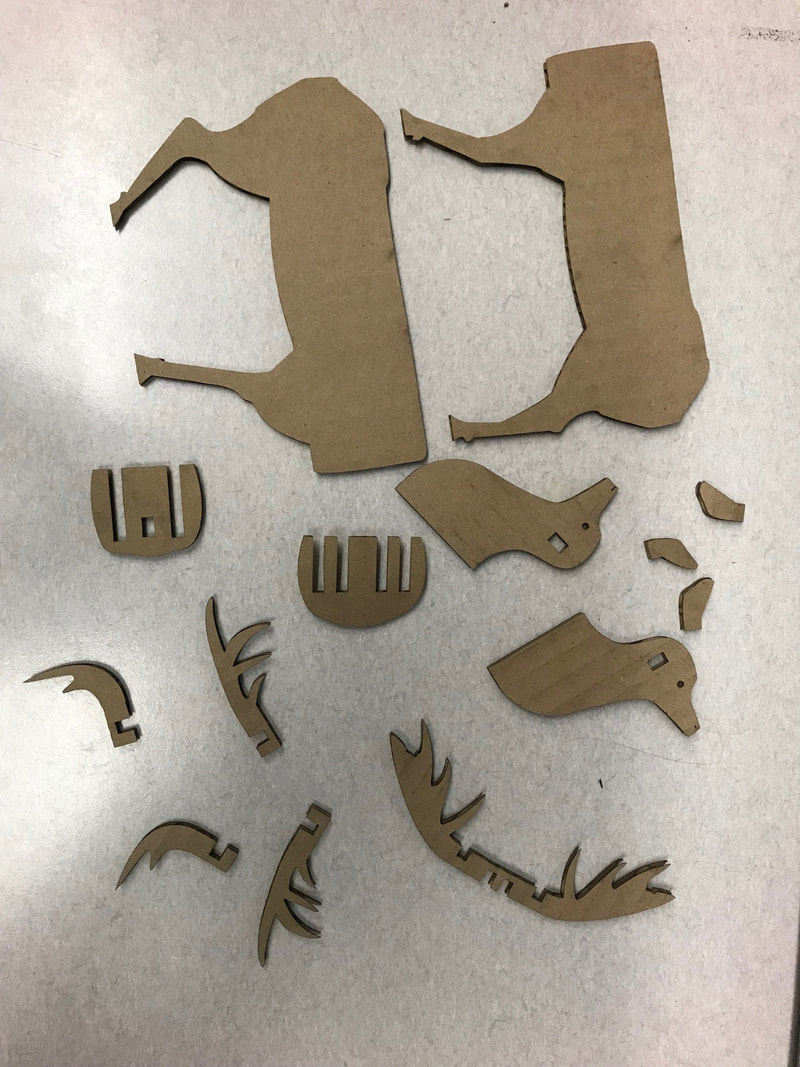
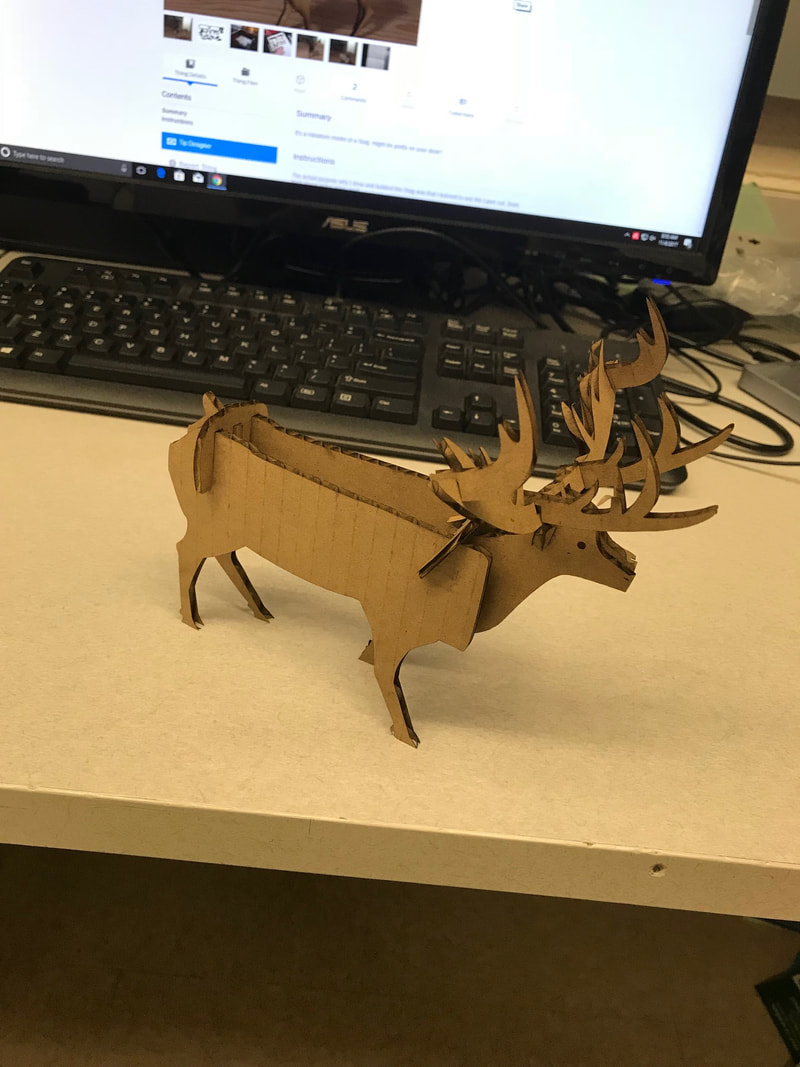
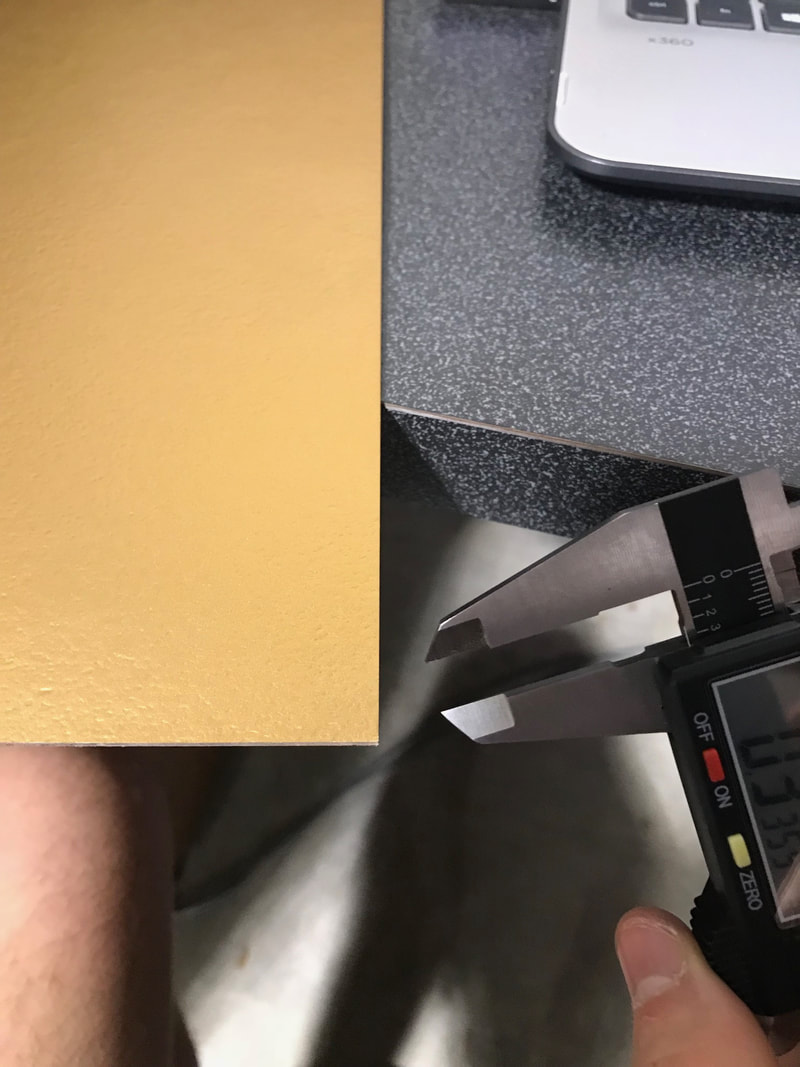
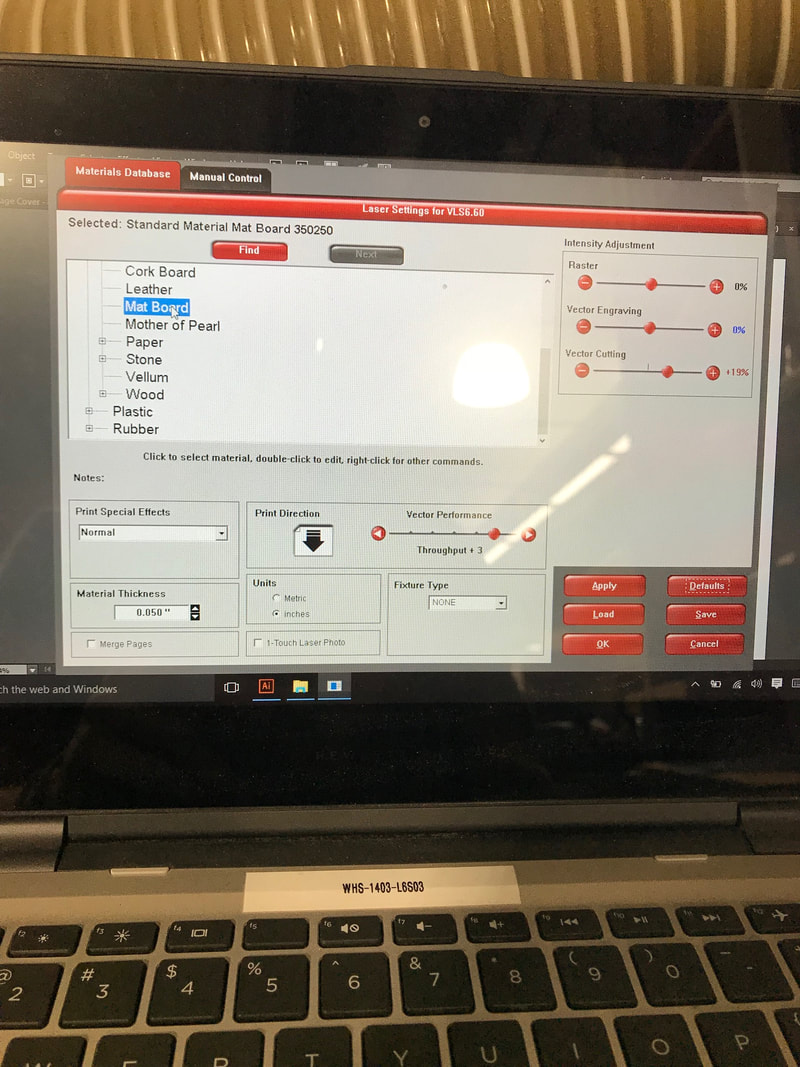
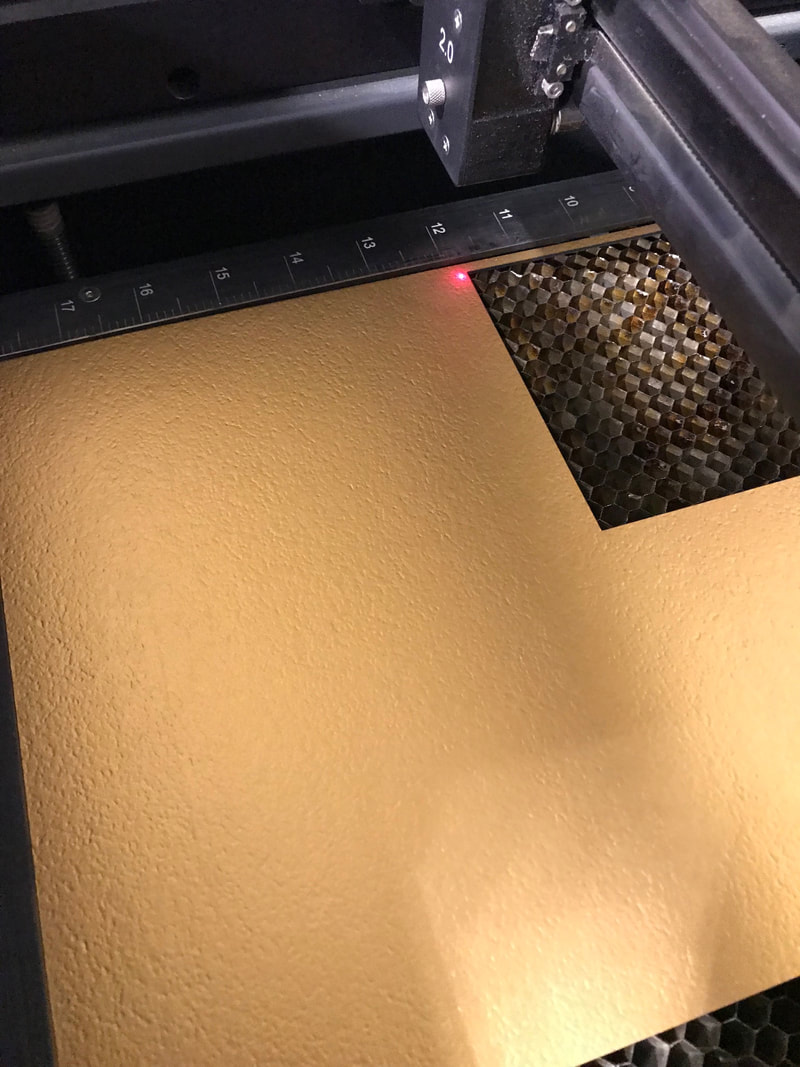
Cut-Out Deer: How I got the idea for my cut out deer is that I went on thing averse and I typed in 3-D laser cut out, and it popped a big list up of a bunch of ideas and the deer stuck out to me. From there it was simple. I had to download the file and then transfer it to a Illustrator file. Then I had to change all the lines to red and .0001 pt lines so the laser could cut it. Then I saved the file and moved it to a flash drive. I then took it down and got it loaded on the UCP, measure the card board go to settings change the material to mat board and the thickness to what I got and print it. After it printed I put it together and finished my cutout.
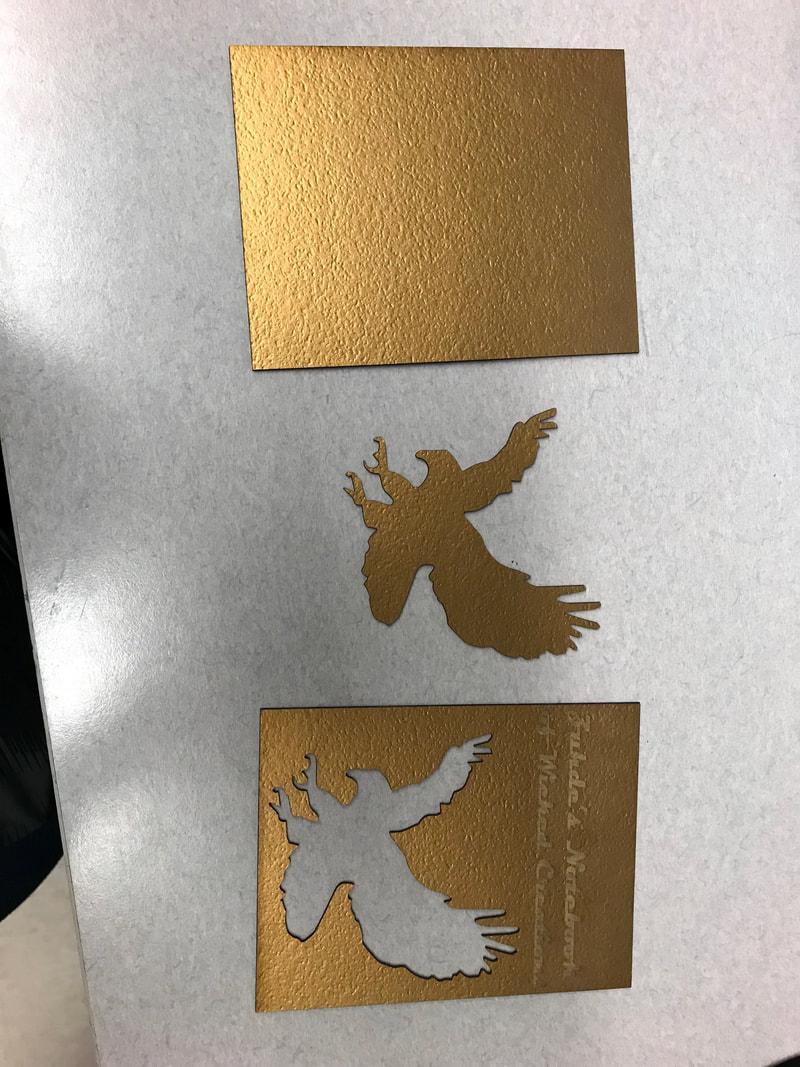
Note Book: For this the idea was already set, I just had to find a picture I liked and a way to name my notebook. For this I made an Illustrator document and then in red .0001 pt lines i make a 4.25in x 5.5in box cause that's how big the not book could be. Then I found some animal outlines on the internet and the eagle stuck out to me so I copy and pasted it and then made the lines red and .0001 pt so the laser could cut it. Finally I put some words and made them blue so the laser would know to engrave. Then I saved the file and moved it to a flash drive. I then took it down and got it loaded on the UCP and did the exact same thing i did for the settings as i did for the cut out and printed it. Then I took normal paper and drew lines on it that were 4.25in x 5.5in so it would fit in my notebook. I then used the spiral cutter and made holes in my paper cover and back of my note book and fed the spiral through. And that was my note book.
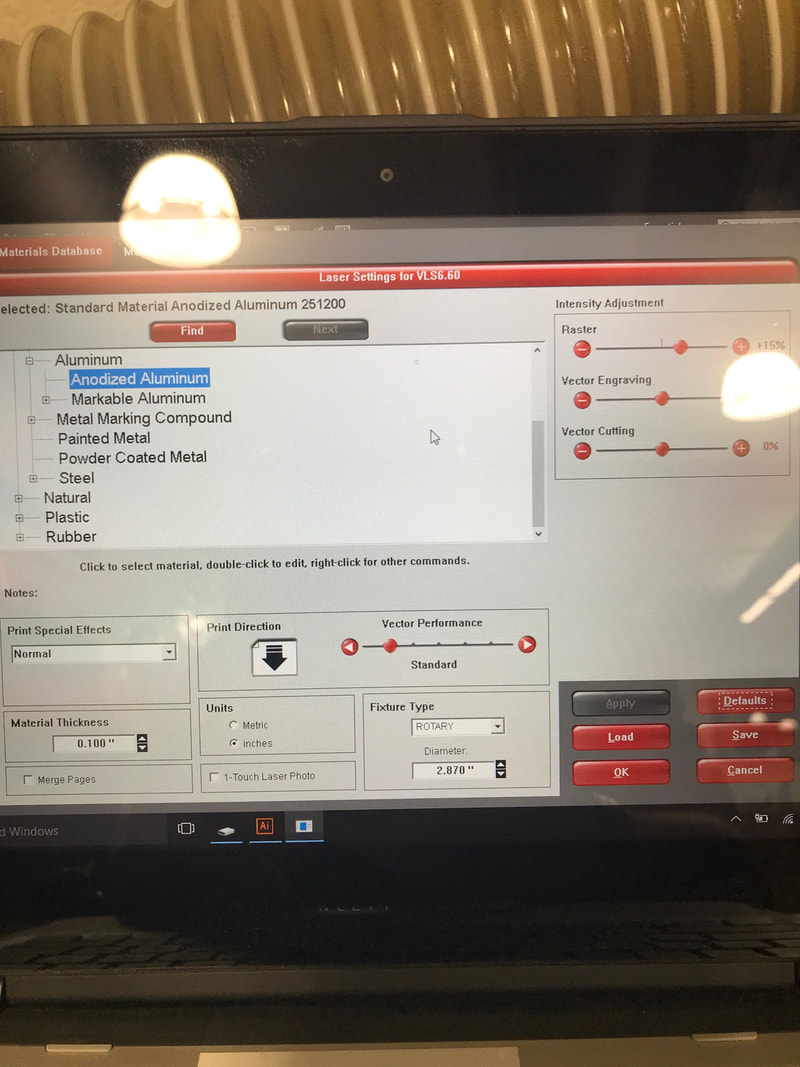
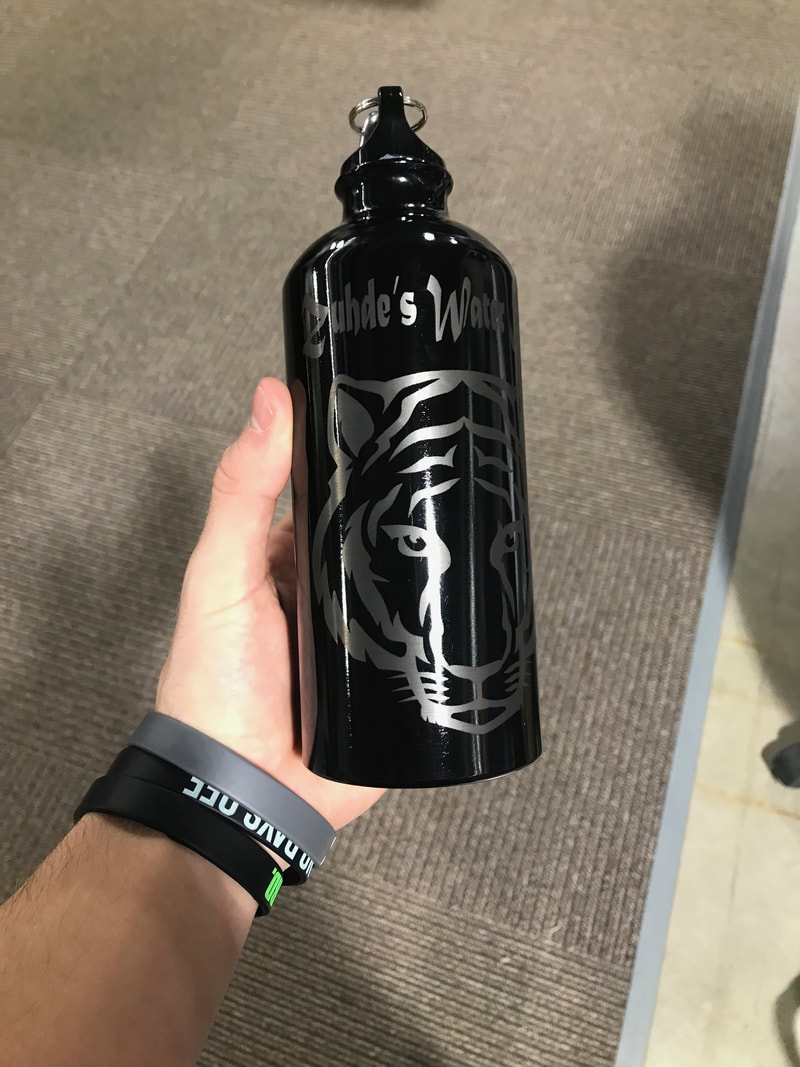
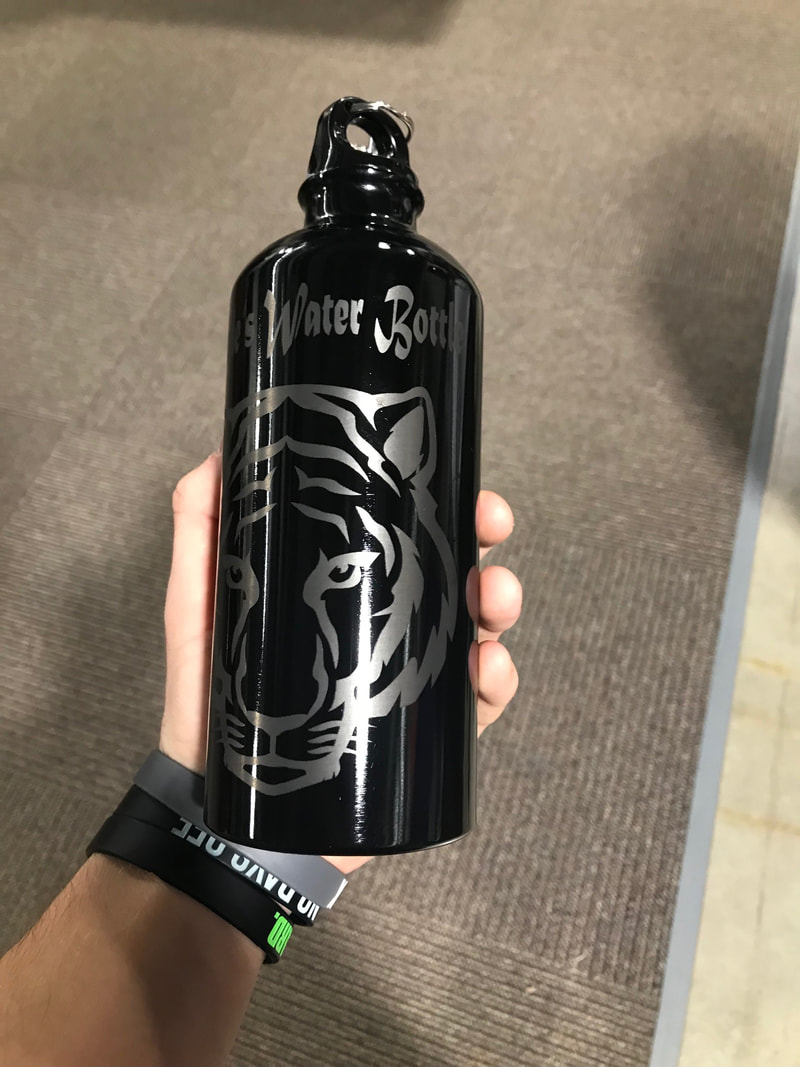
Water Bottle: Finally for the water bottle you were limited on what you could do since you couldn't cut through aluminum you could only engrave. I had to create a document that was 5.5in x 9in because the was the surface area of the water bottle and how much space we could work with. For this I found a pretty need picture of a tiger and put it on my water bottle I then finished it off with my name on the water bottle so I would know its mine. I then saved this and took it down to the UCP on a flash drive. When I got there the rotational jig was in so i put my water bottle in it. I had to change the setting so it would be anodized aluminum as the material and i had to change it to rotary so it would know there a rotary jig in. Then from there is all the same. You move the red laser so your project is right in the middle and begin your print.
Note Book: For this the idea was already set, I just had to find a picture I liked and a way to name my notebook. For this I made an Illustrator document and then in red .0001 pt lines i make a 4.25in x 5.5in box cause that's how big the not book could be. Then I found some animal outlines on the internet and the eagle stuck out to me so I copy and pasted it and then made the lines red and .0001 pt so the laser could cut it. Finally I put some words and made them blue so the laser would know to engrave. Then I saved the file and moved it to a flash drive. I then took it down and got it loaded on the UCP and did the exact same thing i did for the settings as i did for the cut out and printed it. Then I took normal paper and drew lines on it that were 4.25in x 5.5in so it would fit in my notebook. I then used the spiral cutter and made holes in my paper cover and back of my note book and fed the spiral through. And that was my note book.
Water Bottle: Finally for the water bottle you were limited on what you could do since you couldn't cut through aluminum you could only engrave. I had to create a document that was 5.5in x 9in because the was the surface area of the water bottle and how much space we could work with. For this I found a pretty need picture of a tiger and put it on my water bottle I then finished it off with my name on the water bottle so I would know its mine. I then saved this and took it down to the UCP on a flash drive. When I got there the rotational jig was in so i put my water bottle in it. I had to change the setting so it would be anodized aluminum as the material and i had to change it to rotary so it would know there a rotary jig in. Then from there is all the same. You move the red laser so your project is right in the middle and begin your print.

Summary:
During this rotation I learned that you need to use all of the time you have and use it productively, because having to design and laser 3 projects and do a website is a lot for 4 days of wort time. I also learned that there are different colors you can choose that change the may the laser engraves. If it it is a darker color it will engrave darker and if it is a lighter color it will engrave lighter. Also when you are cutting something in the laser if the laser is cutting and the parts are really close to each other it is very likely to start on fire of cardboard because the head is so much in a really small area. All in all from this rotation working hard and efficient is something that I improved upon and my knowledge of how the laser works also improved so for when future projects come with the laser i will know more and be able to do more and when there are bigger projects later on i will know i need to use all of my time as much as i can.
